Managing virtual machines with Vagrant

Years ago, the developer world faced the containers age, which was quicker and stronger than virtual machines, easy to deploy, portable, and lightweight.
So, why are we talking about Virtual Machines?
It is important to highlight that some businesses still use virtual machines to support their products or applications. Paid hosting services, for example, employ KVM (Kernel-based Virtual Machine), VirtualBox, VMWare and Hyper-V. We may also use these virtual machine technologies to run our Linux distribution.
I used to use VMWare and VirtualBox on my Linux to test Windows applications and development. Nowadays, Linux has a lot of support, and wine can simulate programs and tools with plenty of documentation to do this.
However, Roblox Corporation decided to ban Wine, arguing that it is a haven for cheaters. Okay, it's a Windows emulator; is there no cheat on Windows 😕? How can I entertain my son 😢?

Back to Vagrant, this tool was created by HashiCorp, a company that has made significant contributions to the Open Source community. This tool describes a virtual machine ruby file called Vagrantfile, in which images such as Debian, Ubuntu, Arch, Fedora, Amazon Linux, and others may be defined.
Shell scripts or Ansible may be used to prepare virtual machines. That's cool; you may test your configuration in your local environment. Another essential element is the network, which allows us to set public and private ports, as well as mapping and forwarding. VirtualBox, KVM, VMWare and Hyper-V may be utilized for running machines.
Personal application
I started using Vagrant when Docker deprecated the Docker machine tool, which was great when you wanted to create a droplet at Digital Ocean or our testing Docker Swarm. When you run at a local Docker machine, VirtualBox is utilized by default to setup your Docker Host. There are forks from this project, but I only found images with outdated Docker versions, so I went with Vagrant.
Examples of use cases
- MongoDB Cluster
- RabbitMQ Cluster
- Dokku Node
- Docker Swarm Cluster
- Kubernetes Cluster
Vagrant may be used to test clusters in a local environment.
Requirements
VirtualBox
The default, and it works with one cup of coffee ☕ right away. To simulate a virtual machine, I can confirm that the version 6.1 available from the official Ubuntu/Debian repository works. To install VirtualBox, use the following line; for Windows, get the installer here.
# debian, ubuntu
sudo apt install virtualbox

# arch, manjaro
sudo pacman -S virtualbox
Other dependencies as Ruby, will be installed by vagrant.
Network settings
To allow virtual to assign IP addresses, create a file called /etc/vbox/networks.conf. In the example below, we set a range of 192.168.0.0/16.
sudo mkdir -p /etc/vbox
echo "* 192.168.0.0/16" | sudo tee -a /etc/vbox/networks.conf
Installing
Vagrant offers a comprehensive installation that includes all operational systems. Install vagrant by clicking here.
For debians
wget -O- https://apt.releases.hashicorp.com/gpg | sudo gpg --dearmor -o /usr/share/keyrings/hashicorp-archive-keyring.gpg
echo "deb [signed-by=/usr/share/keyrings/hashicorp-archive-keyring.gpg] https://apt.releases.hashicorp.com $(lsb_release -cs) main" | sudo tee /etc/apt/sources.list.d/hashicorp.list
sudo apt update && sudo apt install vagrant
Creating a Virtual Machine
It is now time to configure your Virtual Machine; first, we must declare the Vagrantfile.
IP = "192.168.0.200"

Vagrant.configure("2") do |config|
  config.vm.box = "debian/buster64"
  config.vm.hostname = "hello-vagrant"
  config.vm.network :private_network, ip: IP

  config.vm.synced_folder "shared", "/shared"
end
Let us go over this simple Vagrant file.
- config.vm.box specifies the name of the operating system box;
- config.vm.hostname specifies the name of the virtual machine's host;
- config.vm.network specifies private and public network settings.
- config.vm.synced_folder defines which directories should be shared by the host and virtual machine.
The following command will start the machine, prepare some resources, and let you to log in over SSH.
mkdir -p shared && echo "bar" > shared/foo.txt
vagrant up
vagrant ssh
Provisioning
Shell
The following changes will insert a shell script that creates a dummy file at /home/vagrant/LOADED every time provision is executed.
- Vagrantfile
IP = "192.168.0.200"
ANSIBLE_PATH = File.expand_path("./ansible")

Vagrant.configure("2") do |config|
  config.vm.box = "debian/buster64"
  config.vm.hostname = "hello-vagrant"
  config.vm.network :private_network, ip: IP

  config.vm.synced_folder "shared", "/shared"

  config.vm.provision "shell", inline: "touch /home/vagrant/LOADED"
end
Ansible
Ansible is best suited for complex and reusable scripts. The following changes add Ansible script as a provision that runs as root.
- Vagrantfile
IP = "192.168.0.200"
ANSIBLE_PATH = File.expand_path("./ansible")

Vagrant.configure("2") do |config|
  config.vm.box = "debian/buster64"
  config.vm.hostname = "hello-vagrant"
  config.vm.network :private_network, ip: IP

  config.vm.synced_folder "shared", "/shared"

  config.vm.provision "setup", type: "ansible" do |ansible|
    ansible.playbook = "#{ANSIBLE_PATH}/setup.yml"
    ansible.become = true
  end

  config.vm.provision "shell", inline: "touch /home/vagrant/LOADED"
end
The became attribute defines playbook execution as the root.
- ansible/setup.yml
---
- name: Setup vagrant
  hosts: all
  become: true

  tasks:
    - name: Install packages
      apt:
        name:
          - curl
          - wget
          - nano
          - htop
          - nginx
        state: latest
        update_cache: true
The preceding playbook will install a few APT packages. If you want to learn more about Ansible, follow the link below.

Testing
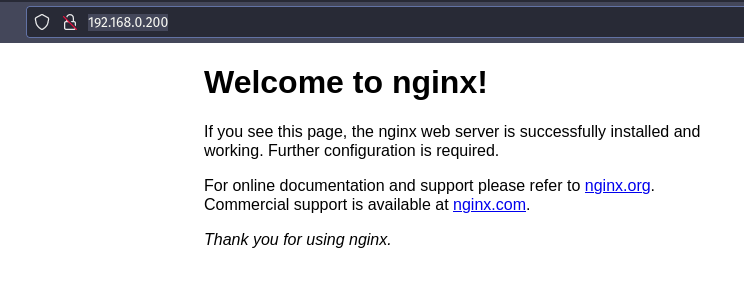
As a huge fan of NGINX, I installed the web server through Ansible Script to test connection; recall, we defined IP 192.168.0.200 for the virtual machine. To test, open your browser.
Commands
Run provisions
# run all provisions
vagrant up --provision

# run specific provision
vagrant up --provision-with setup
Restart
vagrant reload
Stop
vagrant suspend
Destroying machine
vagrant destroy
Connect over ssh
vagrant ssh

# for multiple machines
vagrant ssh [machine-name]
Final thoughts
You may get the source code from my Github repository.
This time, we'll look at how to use Vagrant to build virtual machines for testing scenarios. You may learn more from the official documentation and experiment with KVMKVM or VMWare as homework.
Keep your 🧠 kernel up to date. See ya! God bless 🙏🏿 you.
Time for feedback!