Exploring Awesome WM, my preferred window manager

A few weeks ago, I decided to switch from my latest desktop (Bugdie) to window managers. During my early experiences with Conectiva, Mandrake, and Slackware, I used Blackbox and thought it was fantastic, but I didn't know how to configure things at the time.
So I went back to KDE after trying GNOME, Deepin, Pantheon, XFCE and Bugdie. I became a distro Hopper 🕵️, looking into Desktop and enjoying and hating desktop behaviors. I never found a desktop that was comfy for me.
Why am I here using AwesomeWM rather than I3, BSPWM, XMonad, and other options? I haven't tried any of them yet, but the default theme and menu are similar to the old Blackbox and Fluxbox, and I'm not a Lua highlander developer 🔥, but the language is too simple, and in a few weeks I discovered various references at Git and significant AwesomeWM instructions, for developing my own dotfiles and widgets.
Before diving into AwesomeWM, let's take a quick look at Window Managers.
Window Manager
Is a software component that handles the placement and appearance of windows in an operating system's graphical user interface (GUI). It is in charge of managing the graphical elements on the screen, such as windows, icons, and other graphical elements, and it allows the user to interact with these items.
There are various types of window managers, which can be essentially divided into two categories:
Stacking Window Managers: These allow windows to overlap and allow the user to bring any window to the foreground by clicking on it: Blackbox, Openbox, Fluxbox and Window Maker are examples of stacking window managers
Tiling Window Managers: Tiling window managers organize windows so that they do not overlap. They tile windows to fill the available screen space automatically, which can be more efficient for certain tasks. Instead of using a mouse, users often browse between windows using keyboard shortcuts: I3, Awesome, BSPWM, DWM, XMonad, QTile and Hyprland are examples of tiling window managers.
It's important to note that tiling manager features arrive to come, so desktops as GNOME and KDE introduced tiling features.
AwesomeWM
Awesome Window Manager is a highly customizable, dynamic tiling window manager for the X Window System (the windowing system used by Linux and other Unix-like operating systems). It is intended to be incredibly versatile and adaptable, giving users complete control over the layout and appearance of their desktop environment.
You can do everything you want with done widgets or by yourself with Lua development. I admit that I mixed the two. Creating something from scratch requires too much of you, and you can grow bored fixing and running it for too long, therefore I decided to base my theme on CopyCats. Because there are so many specifications involved in an environment, such as network, CPU, RAM, Graphic Card, Sound Card, Microphone, and so on, certain things may not work at first or with default settings.
CopyCats is a collection of themes on which you can tweak or build your own.
Template file
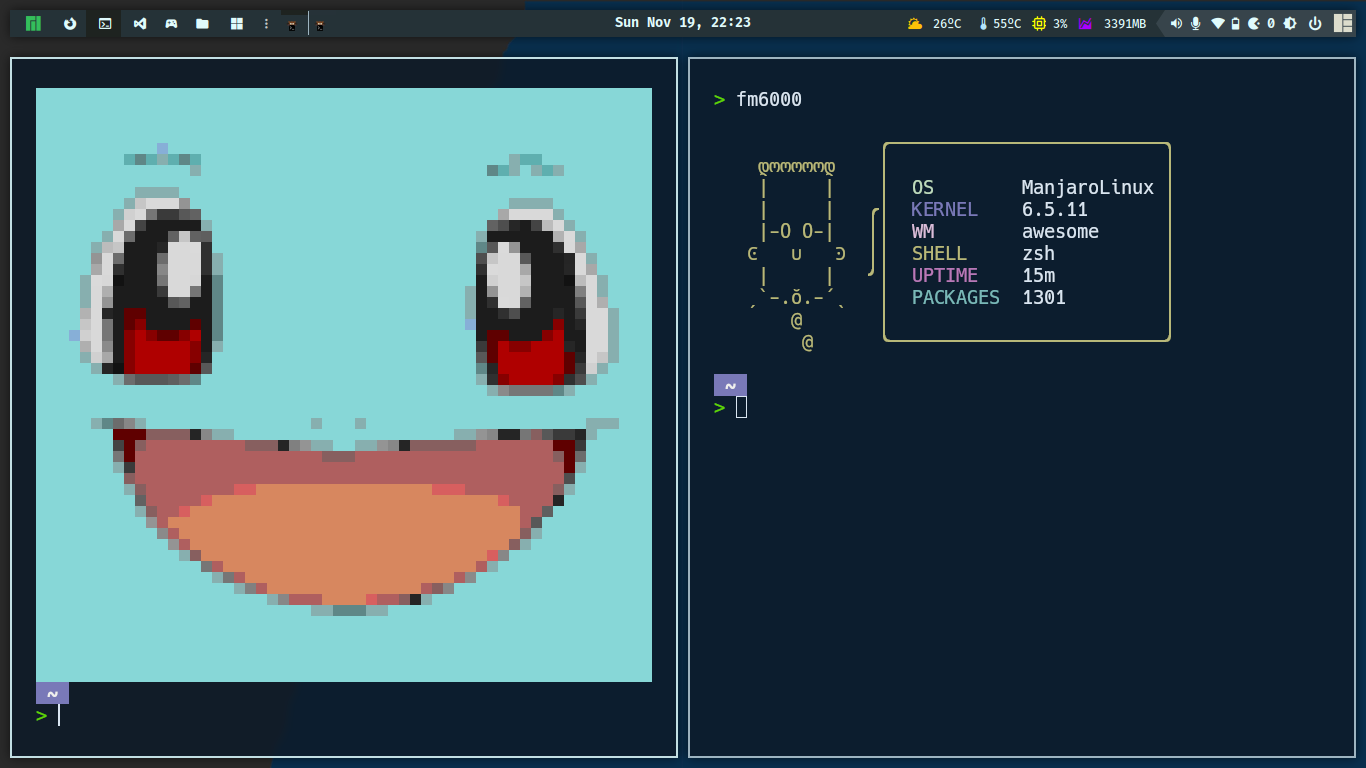
AwesomeWM has a file called rc.lua that contains all of the rules, behaviors, and styles for windows. This file contains comments that separate the template settings into sections.
The file is located by default at /etc/xdg/awesome/rc.lua, and you must copy it to your home location to make your changes.
sudo cp /etc/xdg/awesome/rc.lua $HOME/.config/awesome/00.rc.lua
I have no intention of describing a full template, but I will highlight key areas to demonstrate how AwesomeWM works.
Menu
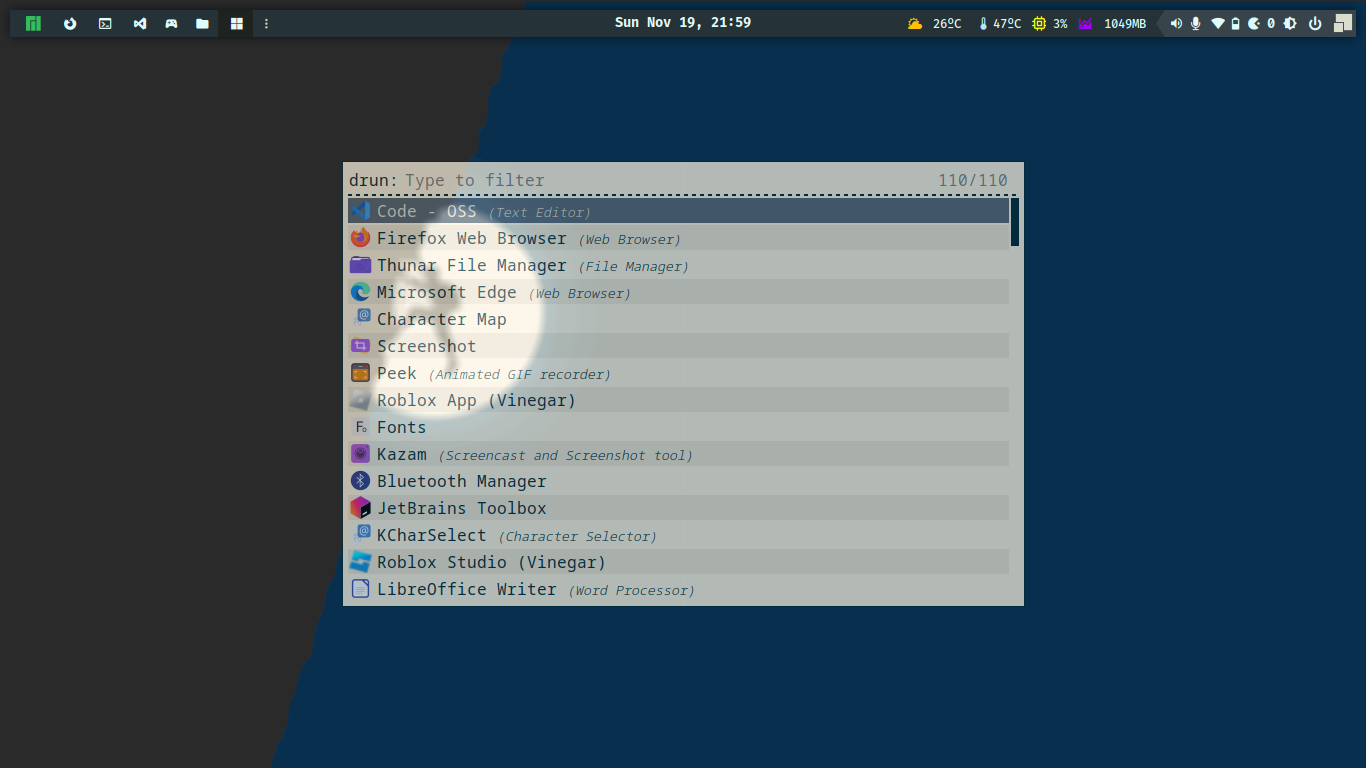
You can attach instructions or functions to a menu or sub-menu, but keep in mind that you can use launcher to execute your apps, of which I choose Rofi.
-- {{{ Menu
-- Create a launcher widget and a main menu
myawesomemenu = {
   { "hotkeys", function() hotkeys_popup.show_help(nil, awful.screen.focused()) end },
   { "manual", terminal .. " -e man awesome" },
   { "edit config", editor_cmd .. " " .. awesome.conffile },
   { "restart", awesome.restart },
   { "quit", function() awesome.quit() end },
}
Tags (environments)
You can have as many environments as you desire, and you can access them with the (⊞ window key + arrows) shortcut.
screen.connect_signal("request::desktop_decoration", function(s)
    -- Each screen has its own tag table.
    awful.tag({ "1", "2", "3", "4", "5", "6", "7", "8", "9" }, s, awful.layout.layouts[1])
end)
Keybindings
You can define or edit any keybinding. The shortcut (⊞ window key + s) displays guidelines for all shortcuts defined in your template, which is very useful.
awful.keyboard.append_global_keybindings({
    awful.key({ modkey,           }, "s",      hotkeys_popup.show_help,
              {description="show help", group="awesome"})
})
Bars
Wibar is highly adaptable; you may specify a widget or group, as well as determine alignment, spacing, and margins. I tried using Polybar at first, but I didn't like the outcome. However, if you want to switch to another Window Manager, Polybar works in the majority of them.
s.mywibox = awful.wibar {
position = "top",
screen   = s,
widget   = {
    layout = wibox.layout.align.horizontal,
    { -- Left widgets
        layout = wibox.layout.fixed.horizontal,
        mylauncher,
        s.mytaglist,
        s.mypromptbox,
    },
    s.mytasklist, -- Middle widget
    { -- Right widgets
        layout = wibox.layout.fixed.horizontal,
        mykeyboardlayout,
        wibox.widget.systray(),
        mytextclock,
        s.mylayoutbox,
    },
}
Now we'll look at templates. I don't recommend employing templates as your final work; instead, separate them into numerous files. Divide and conquer is usually a good method for organizing and keeping your code as professional as possible. Everything in the template is grouped together on purpose to present all settings in a single file; this file is a dump.
Compositor
In the same way that XFCE utilizes compiz to add blur, transparency, and graphical effects to windows, we must use picom to add cosmetic features to Awesome WM.
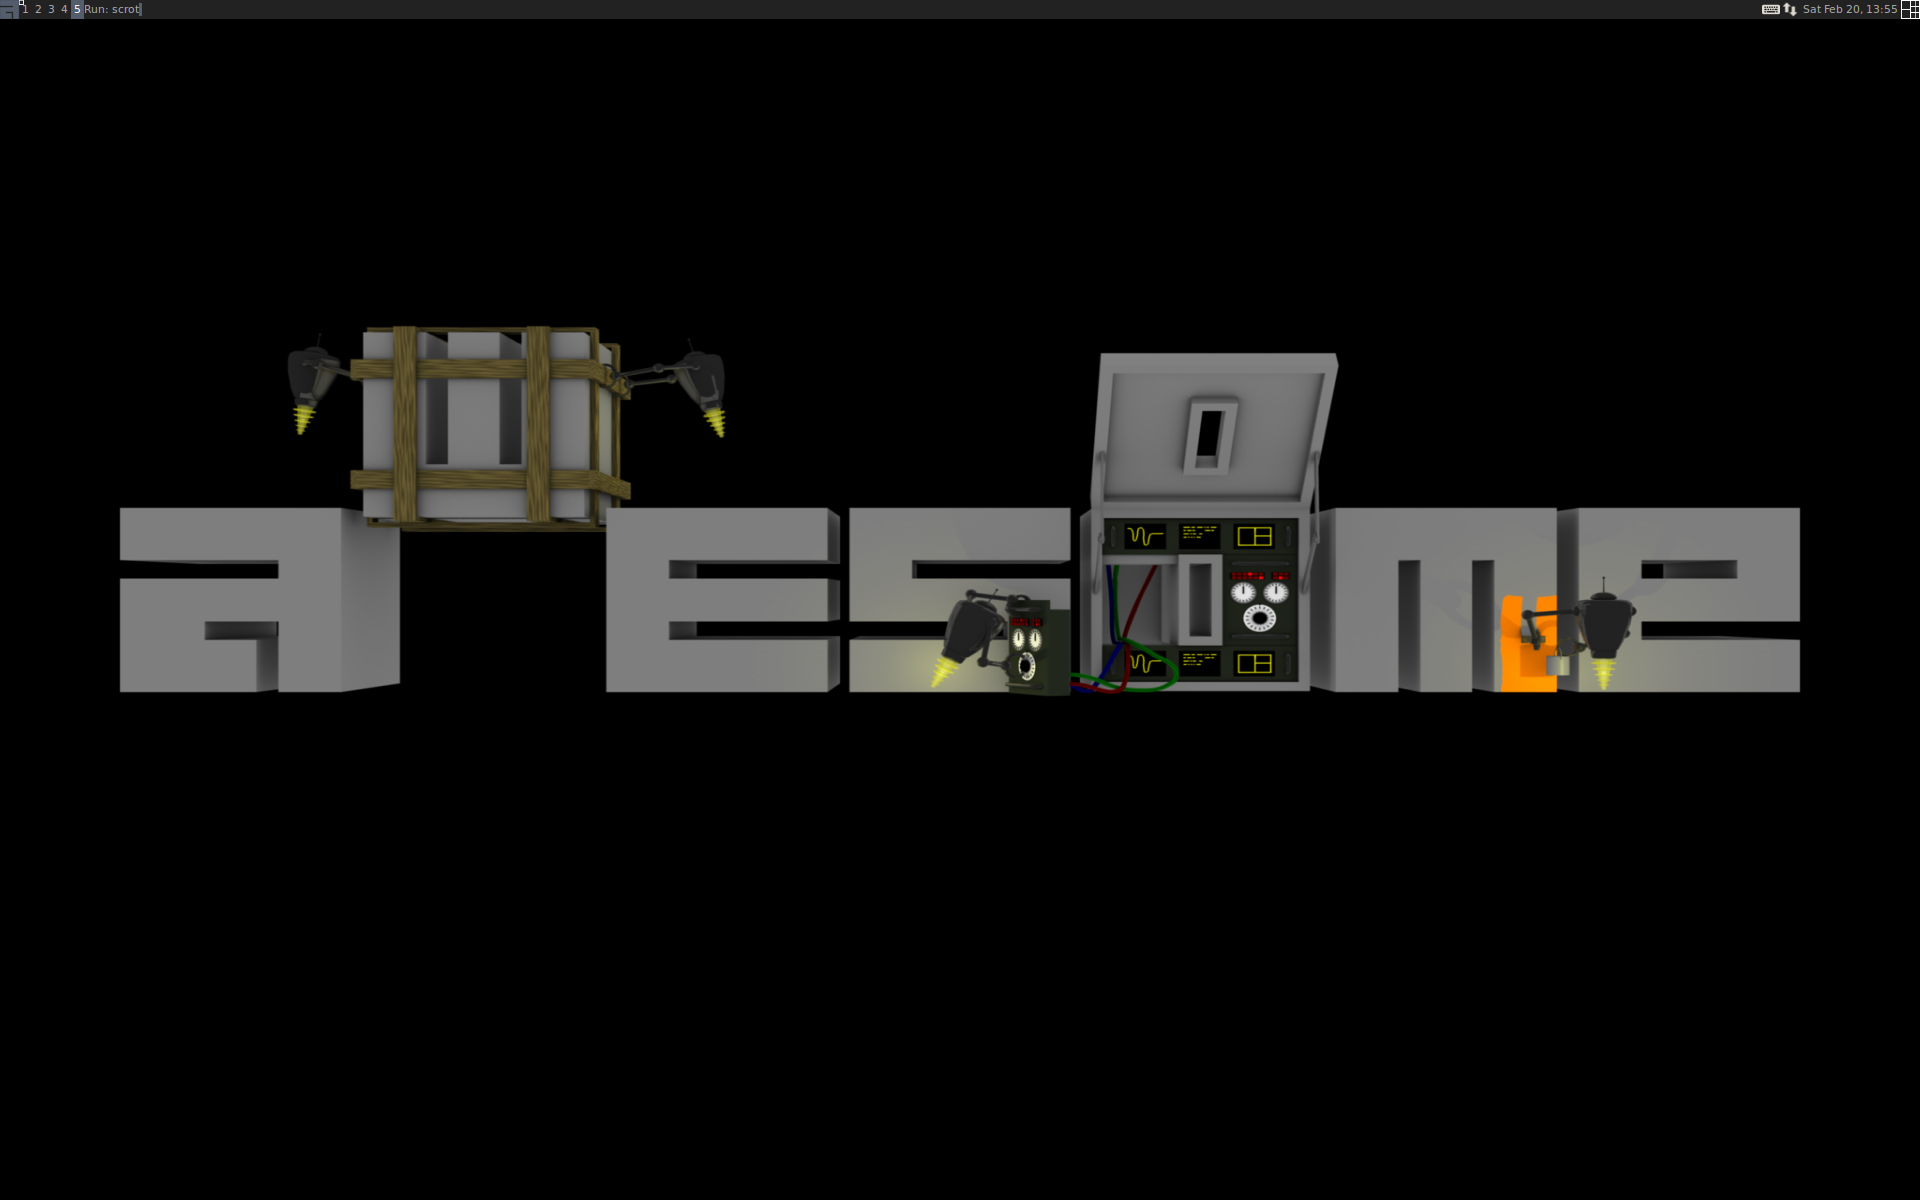
My Awesome WM theme
After weeks of working in this environment, I created something I enjoyed; there is still more work to be done, but I'm happy with my shortcuts and environment feedback. My son accompanied me on this journey and was continuously saying to me, "let me see your little top bar" or "barrinha" in Portuguese.
This theme was named Ebenezer 🪨, which meaning "stone of helper.".
The quote is from I Samuel 7. After defeating the Philistines, Samuel raises his Ebenezer, declaring that God defeated the enemies on this spot. As a result, "hither by thy help I come." So I hope this stone helps you in your environment and, more importantly, in your life. 🙏🏿
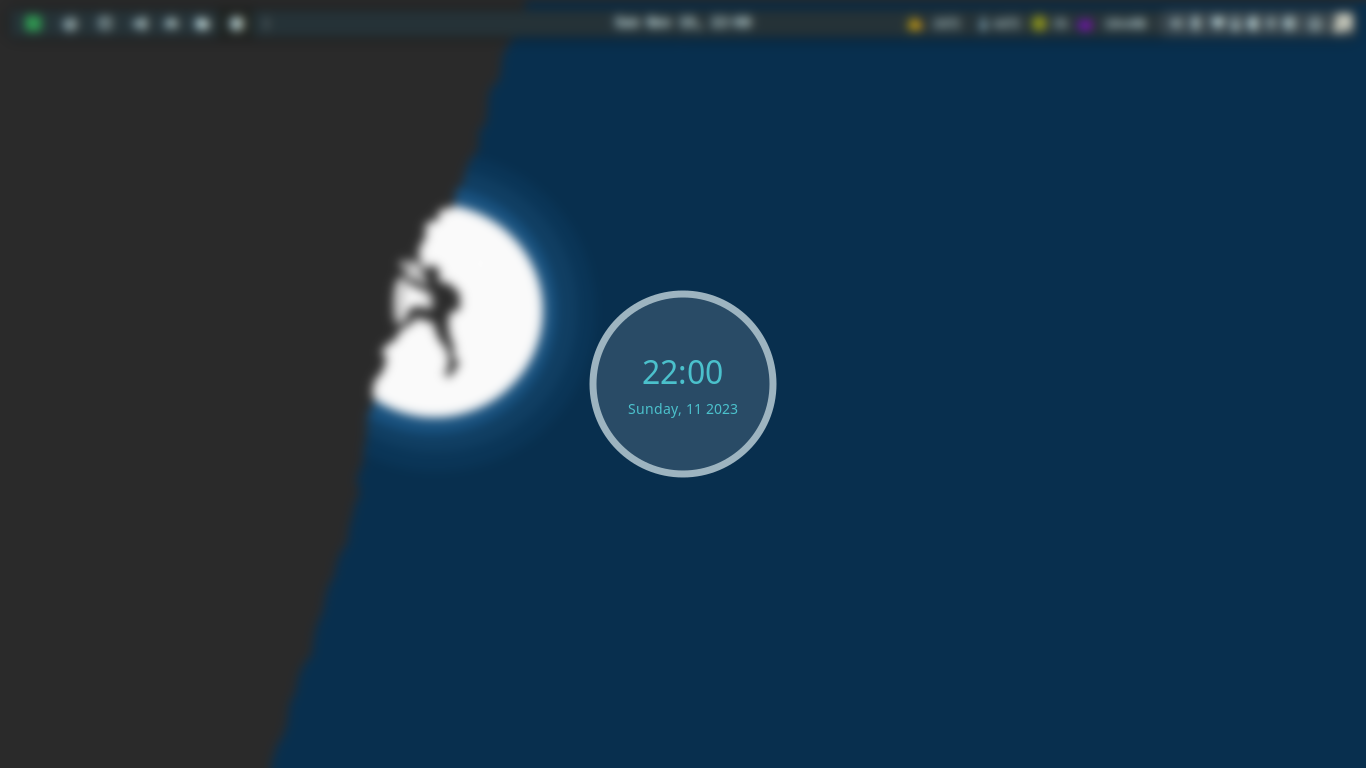
Of course, this top-bar is inspired by others, but I keep what's really important to me to monitor and track, memory, temperature, and CPU, and when something exceeds the indicators colors change, similar to our dashboards at developer context. The battery exhibits the same expected behavior.
I appreciate the idea of keybindings, but for some tasks, I utilize mouse behaviors, such as microphone muting, opening wifi-manager, and tool tips that provide useful information such as wifi signal, current brightness, and battery state.
Following that, I'll explain what this implementation does, and you can clone it if you like; this theme is incredibly adaptable. I'm attempting to keep everything changeable via ini files, therefore there's a file called config.ini where you can customize style and behaviors.
The config.ini
[environment]
modkey=Mod4
weather_api_key=api_weather_key # openweathermap.org
city_id=your_city_id # openweathermap.org
logo=$THEMES/icons/tux.png
logo_icon=
logo_icon_color=#34be5b
wallpaper_slideshow=on # [off] wallpaper solo
wallpaper=$HOME/Pictures/Wallpapers/active.jpg # wallpaper solo
wallpaper_dir=$HOME/Pictures/Wallpapers # when wallpaper_slideshow=on you should inform wallpapers directory
terminal=kitty
editor=nano
icon_theme="Papirus"
icon_widget_with=22
[commands]
lock_screen=~/.config/i3lock/run.sh
brightness_level=light -G
brightness_level_up=xbacklight -inc 10
brightness_level_down=xbacklight -dec 10
power_manager=xfce4-power-manager --no-daemon
network_manager=nm-connection-editor
cpu_thermal=bash -c "sensors | sed -rn \"s/.*Core 0:\\s+.([0-9]+).*/\1/p\""
click_logo=manjaro-settings-manager
volume_level=pactl list sinks | grep '^[[:space:]]Volume:' | head -n $(( $SINK + 1 )) | tail -n 1 | sed -e 's,.* \([0-9][0-9]*\)%.*,\1,'
[wm_class]
browsers=firefox chromium-browser microsoft-edge
editors=code-oss sublime atom
[tags]
list=
browsers=1
terminal=2
editors=3
games=4
files=5
others=6
[topbar]
left_widgets=tag_list separator task_list
right_widgets=weather cpu_temp cpu mem arrow arrow_volume arrow_microphone arrow_network arrow_battery arrow_systray arrow_pacman arrow_brightness arrow_logout arrow_layoutbox
[startup]
picom=picom --config $THEMES/picom.conf
lock_screen=light-locker --lock-after-screensaver=10 &
desktop_policies=lxpolkit # default file polices (open files from browser)
multiple_screen=exec ~/.config/xrandr/startup.sh "1366x768" # type xrandr to check supported mode
mouse_reset=unclutter
[fonts]
font=Fira Code Nerd Font Bold 10
font_regular=Fira Code Nerd Font Medium 9
font_light=Fira Code Nerd Font Light 10
font_strong=Fira Code Nerd Font 12
font_strong_bold=Inter Bold 12
font_icon=Fira Code Nerd Font 11
[colors]
fg_normal=#e0fbfc
fg_focus=#C4C7C5
fg_urgent=#CC9393
bg_normal=#263238
bg_focus=#1E2320
bg_urgent=#424242
bg_systray=#e0fbfc
bg_selected=#5c6b73
fg_blue=#304FFE
fg_ligth_blue=#B3E5FC
fg_yellow=#FFFF00
fg_red=#D50000
fg_orange=#FFC107
fg_purple=#AA00FF
fg_purple2=#6200EA
fg_green=#4BC1CC
bg_topbar=#253237
bg_topbar_arrow=#5c6b73
border_color_normal=#9db4c0
border_color_active=#c2dfe3
border_color_marked=#CC9393
titlebar_bg_focus=#263238
titlebar_bg_normal=#253238
As you can see, there are numerous settings, however I must admit that there are numerous items to include in this file.
Features
Changing the wallpaper when using the slide show mode
Screenshot desktop, window, delayed and area
The screenshot default place is $HOME/Pictures/Screenshots
Notifications feedback's

Launcher (rofi)
Lock screen (i3lock)
Tooltip
Terminal
🎮 Not only a coder, but also a daddy developer, I was playing Roblox with my son while Wine Vinegar consuming and harming my CPU.

Features development
Some features were created from scratch, while others were discovered on Github and changed to my way and style.
If you feel the same way I do, where KDE, GNOME, Mate, XFCE, Cinnamon are too much for you, go with Awesome WM, which is my dotfiles:
 williampsena
That's all folks
In this piece, I'll explain how Awesome WM works and give some useful dotfiles. As a developer, I hope you find this material valuable on a daily basis.
I'll see you again soon, and please keep your kernel 🧠 up to date and God bless 🙏🏿 you.
Time for feedback!